Friday, May 1, 2020

Mickey Rice Krisipe Treats

Making homemade Rice Krispie Treats has been a staple since I was little! Now that I’ve got a little family of my own it’s still one of my favorite treats to whip up and transports me back to childhood even for just a moment! Plus making them Mickey shaped and like they do at Disneyland makes me feel a little closer to the magic at home, especially while the Parks are closed! 

We delivered a bunch of Rice Krispie treats to our friends door steps to try and lift some spirits during this time of social distancing and the response we got back from one of my prolific baking friends was that these were the BEST Rice Krispie treats her family has ever had! That was so sweet of her to say, but I thought if that was the case I might as well share them, the ingredients are not anything novel, but I think just some minor changes and tips kick them up a notch from other recipes! 

1 Cube Margarine
8 C small Marshmallows 
10 C Rice Krispie 
1-2 C additional small Marshmallows 

Heat cube of Margarine in pan, once it’s nearly completely melted begin adding your 8 Cups of marshmallows. Continually stir these until close to melted ( this is a game changer) do not melt them completely you still want to see some lumps as pictured here:

When you reach that point pull your pan off the heat and begin folding in the Rice Krispies you want to keep stirring them quickly, but gently until they are mixed and coated with marshmallows (you want to work quickly so it’s still warm enough to mix easily). Once they are almost or are all coated with the melted marshmallows you want to throw in handfuls of the additional 1-2 cups of marshmallows. Mix these in as well and try to distribute them throughout your Rice Krispies these will melt only slightly and that’s just how we like them.

If you are placing them in a pan or mold do not pack too tightly either, you want them to fit the pan or mold but not be overly compressed (a baking analogy would be thinkvof measuring a cup of sugar vs a cup of brown sugar you don’t want to pack these in but firm enough to hold together).

I then used a Mickey cookie cutter and placed the warm and still gooey Rice Krispies in the cookie cutter. In order to keep them from sticking to my hands I keep a small stream of water running from my faucet and keep my hands slightly damp. You want do not want to make the, soggy just have your hands damp enough that they don’t stick much.
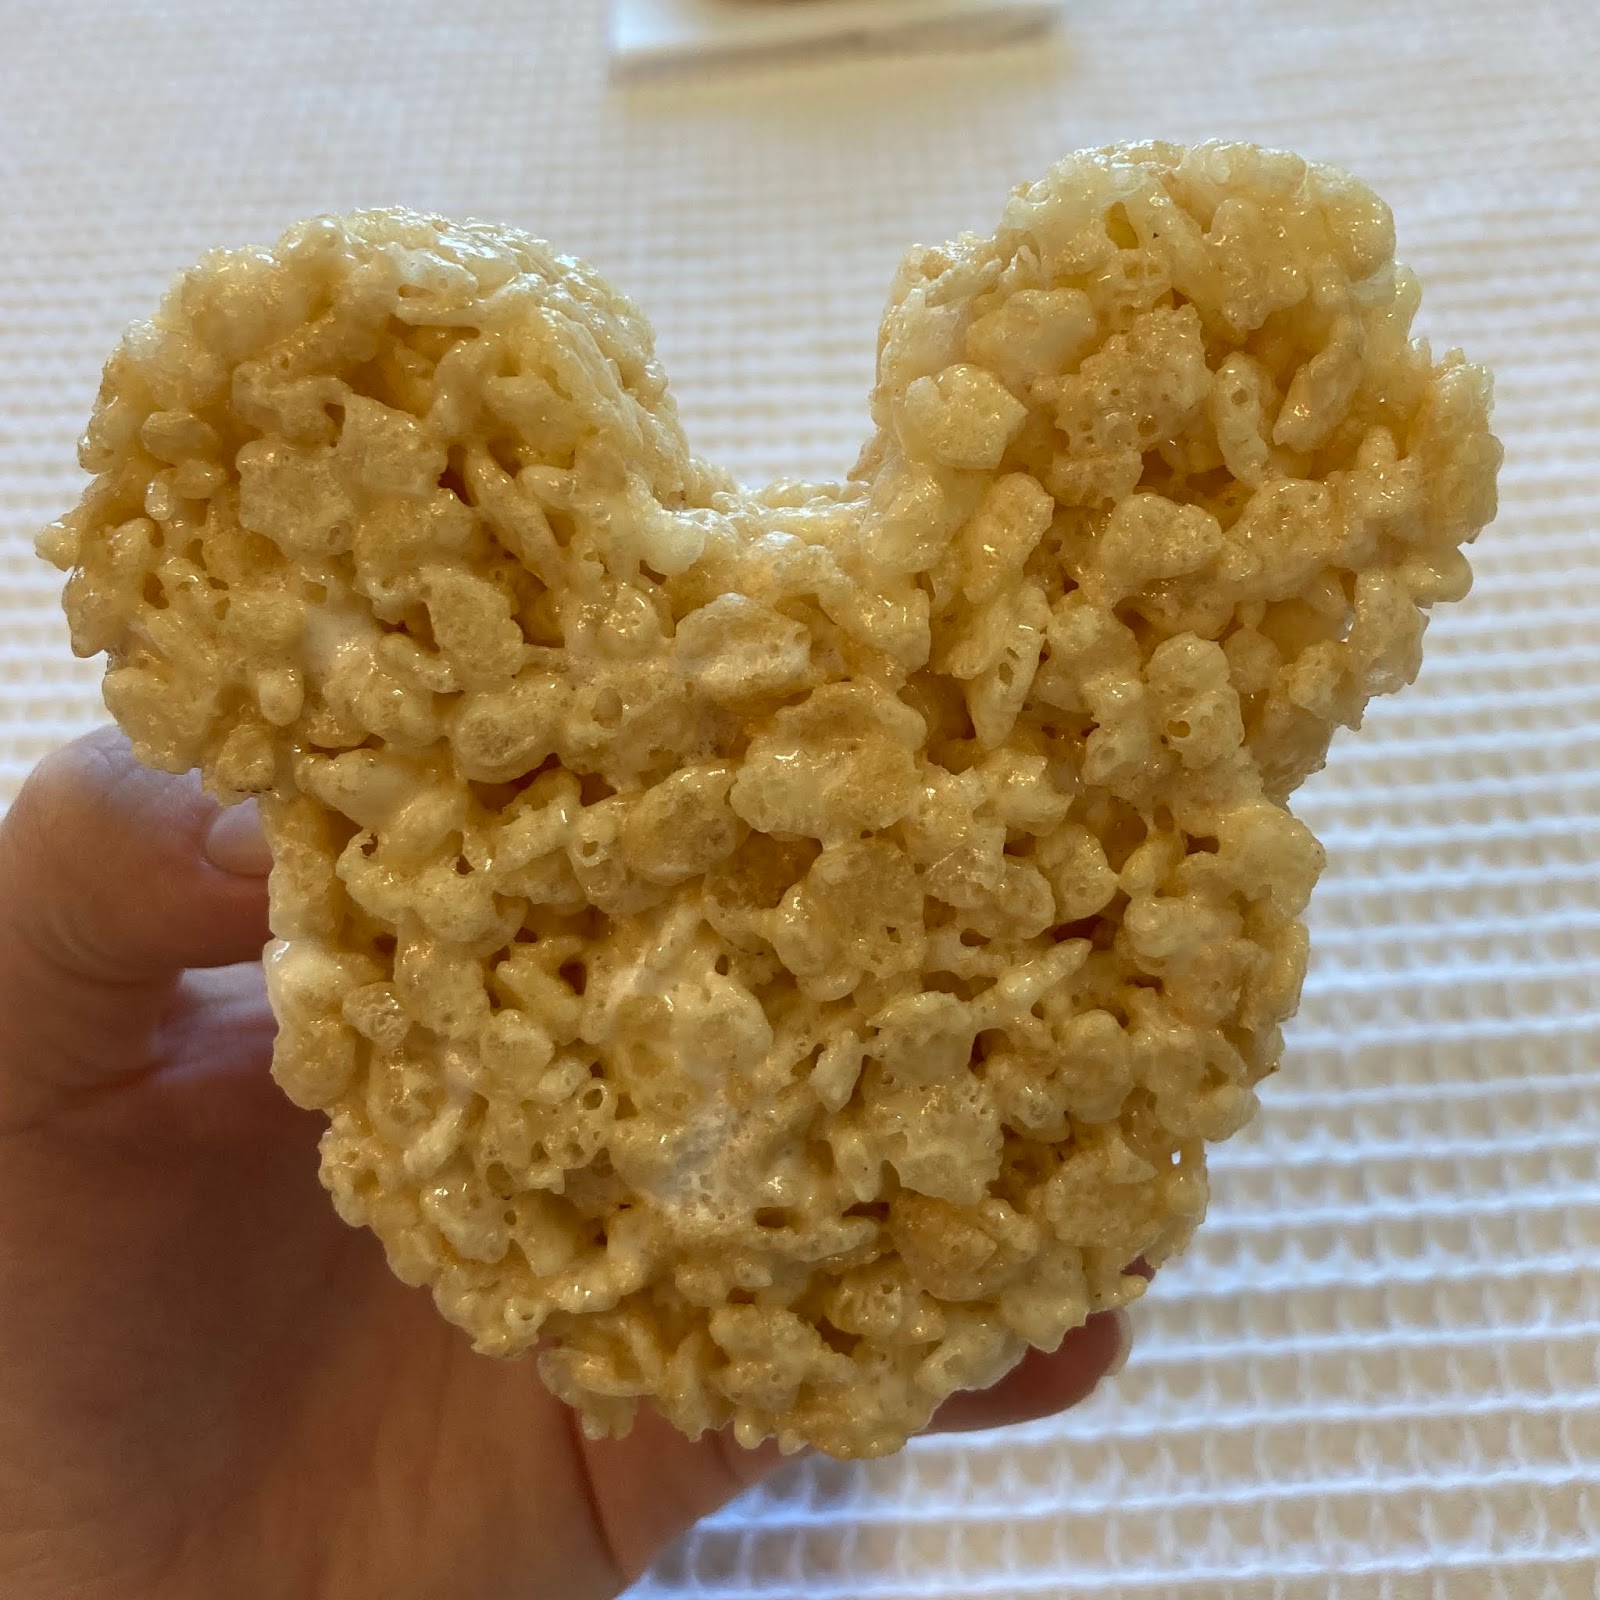

Following these instructions will lead to a gooey Rice Krispie treat that is firm enough to mold but not to crunchy or hard! Plus they will stay softer for longer!

I then tried to put some Disneyland magic into the, by dipping them in melted chocolate chips and then covering them with sprinkles and m&m’s! 

Saturday, March 28, 2020

Fluffer Nutter Snickerdoodle Cookie Recipe

Friends this recipe I am about to share is a keeper! Whether you just need a great go to Snickerdoodle cookie or if you're looking to spice up the classic Snickerdoodle or you need a new cookie during this time of social distancing... or if you're like me and are trying to make some Disney Magic at home while the Parks are closed then this recipe is for you!

We were currently on a vacation to Disneyland when they announced the closures and though our trip was cut a little short we were able to still try one of the amazing Fluffer Nutter Churros at California Adventure, it was for sure the best churro I've ever had and... dare I say it gave my favorite Disneyland Resort treat (the Churro Funnel Cake) a run for it's money, when the Parks open back up hopefully we can make it down to do a formal family taste test of which we like better.

However, til then we need to bring some magic home so....

Let me introduce you to the Fluffer Nutter Churro inspired --- Fluffer Nutter Snickerdoodle!

However, as most things on my blog are Disney inspired and Mickey shaped, I'm thinking we should collectively come up with a name. My top ones are the Smickeydoodle, the Mickerdoodle, and the Smickerydoodle... what are your thoughts?! I am also open for other suggestions! Either way these are delightful! 

Snickerdoodle Recipe: 
1 C. Butter
1 1/2 C. Sugar
2 lg Eggs
2 3/4 C. Flour
2 tsp. Cream of Tartar
1 tsp Baking Soda
1/4 tsp. Salt
3 TBSP Sugar
3 tsp. Cinnamon

Have on hand peanut butter, chocolate chips and marshmallows if you're turning these into Fluffer Nutter Snickerdoodles. 

Preheat oven to 350 degrees.  Cream together butter, 1 1/2 C. sugar, and eggs. Combine flour, cream of tartar, baking soda, and salt in a separate bowl. Add dry ingredients into butter mixture. Then separately mix the 3 Tbsp sugar and 3 tsp. cinnamon in a small bowl.  Use cookie scoop and roll scooped dough into the cinnamon/sugar mixture and coat balls by gently rolling in the mixture.  Place on ungreased cookie sheet and cook for 10 minutes.-- Watch cookies closely to find the appropriate baking time for your oven.

Then after they have cooled, melt some peanut butter ( I love Jiff specifically reduced fat) and I put just a small amount in the microwave and heated it til it was a drizzling consistency (about a total of 30 seconds in 10-15 second increments). Then drizzled the cookies and sprinkled mini chocolate chips and marshmallow pieces.  

Notes: The peanut butter, chocolate chips and marshmallow can be a little overpowering to the cinnamon taste and you want all the flavors to mix together, my goal was to not have one flavor overpower the others so I would just drizzle lightly the peanut butter over your cookie (remember you can always add more later if you desire). 

Sidenote: I live at a lower elevation and have a oven that runs a little hotter than most so I had mine set to about 335 degrees and cooked for 11 minutes.

Happy Baking!

Monday, February 10, 2020

Banana Muffins You Will Love

With it being the week of Valentines I wanted to share a few of my favorite recipes that I LOVE and know that you will LOVE too! These Banana Muffins are sure to be a hit. My mom and I went through our favorite family recipes and played around with them to make them even better and this is the one we've come up with. 
If you are more of a Splenda person we have a lower sugar version for you too, just follow the substitution instructions! 
As far as picture details go, a few years ago my mother in law gave me these cute heart shaped muffin tins which make anything that goes in a tin that much more festive! However, if you don't have those you can actually use marbles in regular muffin tins and shape it into a heart! Just give that a google for instructions! But what I love even more than this muffin recipe is that Mickey Mouse cake stand, seriously all the heart eyes for that little guy! My best friend just sent that to me for my birthday and I cannot get enough of it, beyond me already making it part of my kitchen decor I may just display everything from microwavable meals (grad school wife life) to fancy cakes on it! 

1/2 C Butter (1 Cube)
1/2 C Yogurt plain or vanilla-awesome or Butter Milk
1 1/2 C sugar*
3 eggs 
3 C Flour
1/2 tsp salt
1 1/2 tsp soda
4-5 medium Bananas- very ripe mashed 
Optional Walnuts or slivered almonds on top 

Cream together: Butter, yogurt, sugar, add eggs
Stir together: Flour, Salt & Soda
Mash Fine- Bananas ( do not use more than 5 it gets to mushy)
Add Bananas to creamed mixture, blend well.  Slowly add flour mixture and optional nuts.  Don't over mix
Pour into lightly greased loaf pans 
Use ice cream scoop 1 per muffin and 4 scoops per small loaf pan 

(My oven runs a little hotter than most so I do it at about 360 for 15. So adjust the following accordingly)
For muffins cook at 375 for 18 minutes
For small loaf pan cook 325 37-40 minutes place 4 small loaf pans on cookie sheet.
For large loaf pan cook 325 for 50 minutes 


* or you can do 1/2 C sugar and 3/4 C Splenda
Another option would be using half the amount of white flour and adding half the amount of whole wheat flour. Remember for buttermilk you can sour milk using 1 TBSP lemon juice or vinegar for to equal 1 Cup milk.

Tuesday, December 3, 2019

Homemade Christmas Oreos

It is no secret that I have been on a homemade Oreo kick, and I'm not even sorry about it! So to keep with that I have added these super fun Christmas time homemade Oreos to the mix! They're so good, very little mess (granted I don't count the sprinkles as a mess cause I had so much fun rolling the frosting in them) and very festive!

Recipe
1 pkg Devils Food Cake Mix
2 Large Eggs 
1/2 C Canola oil (or vegetable oil)


Cream Cheese Frosting
2 Cubes Butter
8 oz Cream Cheese
5-6 Powder Sugar
1 tsp Vanilla
2-3 Tbsp Evaporated Milk (Based on consistency)

Roll into small balls (just slightly larger than a quarter). Smash out dough. No need to grease the cookie sheet.  However, make sure that you scoop dough balls and shape the dough similar in size so they have a cookie match.  Bake at 350 (if you are at sea level consider going a a little lower in temperature) and then I bake them for right about 8 minutes.  Let them cool on cookie sheet for a couple of minutes. Frost inside generously and sandwich cookies together, roll side frosting into Christmas sprinkles!

Friday, November 1, 2019

Game Day Football Oreos

Game Day Football Oreos! These are so fun, they are the same recipe as the homemade Oreos I featured previously and the only change is shaping the dough a little different and adding the decorative top! These are so fun! I got to go to a NFL Thursday Night Football game recently and experience my first ever NFL game and it was such a blast! So for all of you enjoying this time of year with all the NFL and College Football these cookies will make it that much better!  


Recipe
1 pkg Devils Food Cake Mix
2 Large Eggs 
1/2 C Canola oil (or vegetable oil)

Roll into small balls (just slightly larger than a quarter). Smash out dough and form into a football shape, (not just a circle but more of an oval with points on the end was what I had to keep telling myself).  No need to grease the cookie sheet.  However, make sure that you scoop dough balls and shape the dough similar in size so they have a cookie match.  Bake at 350 (if you are at sea level consider going a a little lower in temperature) and then I bake them for right about 8 minutes.  Let them cool on cookie sheet for a couple of minutes. Frost inside and then put a portion of frosting in a decorating bag and make the lines on top of the cookie like a football has, as pictured.

Cream Cheese Frosting
2 Cubes Butter
8 oz Cream Cheese
5-6 Powder Sugar
1 tsp Vanilla
2-3 Tbsp Evaporated Milk (Based on consistency)

Monday, October 28, 2019

Witch Finger Bread Sticks

These bread sticks give "finger foods" a whole new meaning just in time for Halloween!


1 Package (1 scant Tablespoon) active dry yeast
1 C Warm Water (110-115 degrees F.)
3 Tbsp Sugar
1 tsp Salt
2 Tbsp Vegetable Oil
3 C Flour
1 Egg White
1 Tbsp Water
Sprinkle of Parmesan cheese (optional)

Dissolve yeast in warm water in a large mixing bowl.  Stir in sugar, salt and oil.  Add 2 cups of the flour and beat until smooth.  Add enough remaining flour to make a soft dough ( I use about 3/4 C).  Knead on a floured surface for 6-8 minutes until smooth and elastic (I use some of the additional flour from the 3rd cup to flour the surface). Spray bowl with nonstick cooking spray; place dough in bowl, turning to coat all surfaces with spray.  Cover and let rise in a warm place until double in size, about 1 hour.  Punch dough down and divide into at least 12 pieces.  Roll each piece into a rope.  Spray a baking sheet with nonstick cooking spray and sprinkle with cornmeal. Place bread sticks one inch apart on prepared sheet.  Let rise, uncovered, until double in size about 45 minutes.  Beat egg white with 1 Tbsp water.  Place almond slice on as decorative nail (for spooky effect) sprinkle with Parmesan cheese (optional) then brush egg wash over bread stick.  Preheat oven to 400 degrees F.  Place a large shallow pan filled with very hot water on the lowest rack of oven, and put baking sheet with bread sticks on the middle rack.  Bake bread sticks for about 10 minute, brush again with egg white and bake 5 minutes more or until golden brown.   Living at sea level I bake slightly shorter amount of time and slightly lower oven temperature.

Sunday, October 20, 2019

Mickey Pumpkin Bars

Friends these pumpkin bars are so so good! There are so many things that I love about them but mostly I love that they are easy to make, stay fresh for days on end, feed a crowd, can be made well beforehand, are hard to mess up and are super moist and tasty! Our neighbor shared them in our Church Cookbook and they are just the best! They cut super smooth, which is oddly so satisfying, but also look at how fun it is when you use cookie cutters for them, making mickey and pumpkin shapes somehow makes them even more magical!

Pumpkin Bars:
4 Eggs
1 & 2/3 Cup Sugar
1 Cup Oil (the Costco olive oil works great, but so does just regular vegetable oil)
2 Cups canned pumpkin
2 Cups unbleached flour
2 tsp cinnamon
1 tsp baking powder
1 tsp baking soda
1 tsp sea salt (my mom has used regular salt and it works great too, if you do use sea salt make sure it's just fine sea salt you wouldn't want to use the coarse salt)

Beat together eggs, sugar, oil and pumpkin.  Whisk together flour, cinnamon, baking powder, baking soda, and salt.  Mix dry ingredients and wet ingredients just until nice and smooth, scraping sides - do not over beat.  Spray large cookie sheet with cookie spray and make sure to use a paper towel to get it up on the sides as well. Bake at 350 degrees for 22 minutes (I'm more at sea level so I did more like 335 degrees for 22 minutes and it worked great).  Then Frost when cooled.

Cream Cheese Frosting:

3 Cups powder sugar
3/4 Cup butter, softened
6 oz cream cheese
1 & 1/2 tsp vanilla.